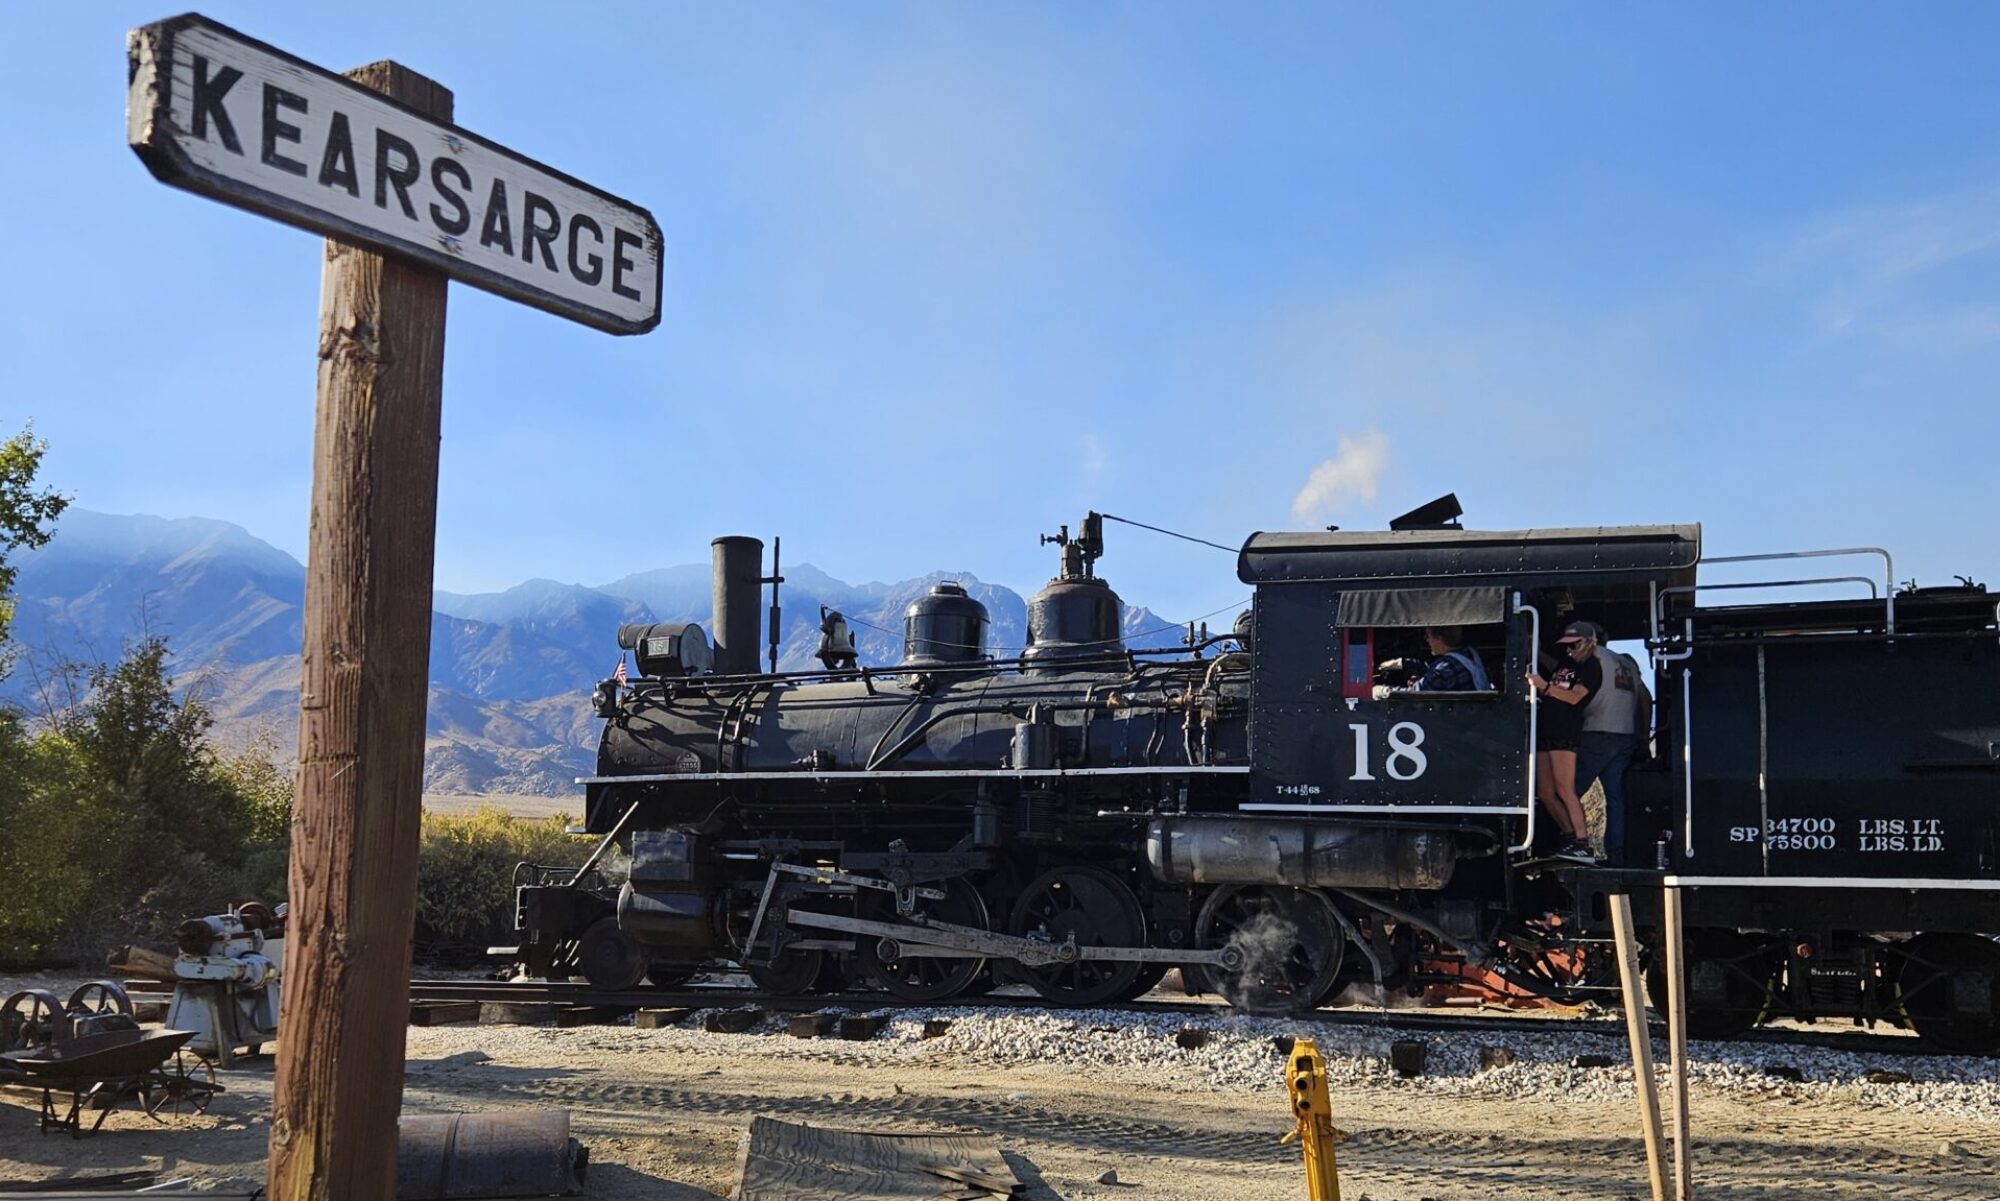
Southern Pacific #18 restoration – February 2015

The new reservoirs drilled and ready.
Rick shows off the finished lube lines.
Travis and Randy lagging away.
The lagging continues.
Marty and Randy mudding the first courses.
Travis is giving a final lap on the throttle.
Sometimes skinny pays off. Travis installing the throttle.
Marty tightens down the dome lid.
Marty getting the doughnuts ready for installation.
Dave and Marty lying around.
Everyone waiting for Marty.
Doing the final tightening on the seats.
The engineers injector loosely in place.
In comes the bell.
In comes the bell.
Fitting the bell and roughing in the jacketing.

bell 20150220_151945

February may have only 28 days, but we managed to work 8 of them over the course of two weeks.

The first work week was three days that focused on drilling the new reservoirs and installing the lube and air lines. The reservoirs are newly built and certified, and along with the process of drilling them with a series of very shallow holes, allows them to not require annual testing per FRA regulations. This is the same practice on modern diesel locomotives. The lube lines, and air lines, are four lines that run from the cab under the insulation to the valves, air sanders on the sand dome, and bell ringer. These lines all had to be bent into position, threaded and, the copper flared and annealed.

After making tremendous progress with a small crew, a larger crew was on the job the following week for almost five full days. There were multiple areas of focus over the week, perhaps the most noticeable work was lagging the boiler. Installing the insulation, or lagging, is a dirty job that at one time would have been done with asbestos. Today we use calcium silicate block and mud. Utilizing the heavy wire we had previously wrapped around the boiler barrel we started at the front bottom and worked our way up and around wiring the block with light gauge stainless steel wire to the existing wire. Some areas were easy with full blocks, while some areas required custom cut pieces. After about 16 hours with three of us cutting, wiring, and measuring we had the entire boiler barrel complete (the cab and wrapper sheet areas will not be lagged until after the first steam up) and ready to mud all the rivet and pipe areas. It was exciting to see a different looking locomotive after all these years looking at a red primer boiler.

Before we had lagged the area around the dome we had our FRA inspectors in town to perform their post hydro interior inspection. All went very well with the inspection and we were able to re-install the throttle and the dome lid. This was their last inspection prior to the engine being steamed up.

Before putting the throttle back in we did a bit more lapping on it since we had discovered it leaked some during our previous hydro test. After lapping, it was then time to install the throttle, which, as we have come to find out is about the most difficult job on this engine. Travis kindly volunteered and squeezed into the dome to do the install. Hours later, the dome was installed and we performed yet one more hydro to make sure our previous re-sealing of the dry pipe joint on the front flue sheet was not leaking, thank goodness it wasn’t, or we may have given up the entire project in frustration.

With the dry pipe not leaking, we moved onto our other big – or at least heavy – job, installing the steam pipes in the smokebox…yet again. Thanks to the aforementioned dry pipe joint that was leaking we had to remove the pipes after our first install, did I mention they weigh about 300 pounds each. At least we were experts at doing it and this time it took only about 2 hours to have them both in and seated in place. The firemans side proved to be a bit tricky since the newly repaired ears were just slightly off of the correct angle.

With pipes in we then hydro tested them through the slide valves to make sure the joints were all sealing, which they were, with the exception of one that required a little more tightening.

Aside from the bigger more photogenic projects mentioned above, there were also many other important things occurring such as cleaning up the fire bricks (these were new bricks installed in the 90’s but the loco was never fired with) and prepping them for re-installation, installing some of the below cab floor air lines and brackets, and also fitting the injectors and their brackets and plumbing.

On our final day of work, after the insulating mud had dried we began to fit the new (old) jacketing. The jacketing was built in the mid1990’s when the asbestos and original jacketing were removed. While in generally good condition, it will require replacement of some pieces and refitting of others. To correctly fit the jacket we had to re-install the bell and lower steam dome rings.

For next months work we can now continue on with installing the petticoat pipe in the smokebox, install the firebrick and sand dome as well as continue on with the jacketing. Slowly but surely we are getting closer and closer to steam!

Finally, we received a new boxcar! Well actually it was delivered back to us from Olancha where it had been living. #451/13 is honestly in the best condition of the 3 boxcars currently at the museum. Currently we have no plans to do anything with it other than set it up for storage. Someday we would like to make one boxcar serviceable for behind the #18 at the museum and this may be the one.

As always a big THANK YOU to everyone that comes to work as well as everyone that helps house and feed those who do come from out of town, we couldn’t do it without you!!

Bob and Scott are cleaning up the fire bricks.
Our new boxcar #13
Our new boxcar #13

Southern Pacific #18 restoration – January 2015

Train 1-18-15 012
Scott and Rick look over the newly installed, cab and dynamo brackets.
Train 1-18-15 034
The firing valve and plumbing starts to go back on.
Train 1-18-15 014
Forrest holds the highly technical “bar napkin” drawing in front of the first roughed in baffle plate.
Train 1-18-15 030
The temporarily fitted cab flooring
Train 1-18-15 019
The redneck rod brass press is ready to go to work.
Train 1-18-15 020
Pressing out like butter.
Train 1-18-15 018
Rick is ready for the next rod.
Train 1-18-15 026
All pressed out and ready for new brass.

January 17-18 was our first 2015 work session. Refreshed and ready for some more fun, a small group of the guys made some good headway.

First up was to finish up bolting the cab down, and do some more adjusting the new lube lines and air lines to the sanders and bell. With those complete a trip to the museum was in order to bring back more pieces to the locomotive. Things like the dynamo base were reinstalled, the fuel valve and lines were put back in place and the new cab floor was brought out of storage to check to make sure it fits, although its not quite ready for permanent installation. The new boiler jacketing was also brought over and sorted out to make sure it is ready to go (sorry no photos).

Meanwhile, with a highly technical drawing in hand, Forrest began roughing in the new set of baffles for the smokebox. Baffles help to retain the gasses in the smoke box before they exit the smokestack and help improve steaming efficiency. As found in the park, the #18 did not have any baffles, only a petticoat pipe, but there was evidence that it did at one time have a “master mechanic” front end. After some consideration we decided to remanufacture a set of baffles in line with what it would have originally had. While they won’t be finished and installed until the steam pipes are permanently installed, Forrest’s work got us off and running.

Finally, after most of the jobs on the list were wrapped up, all the side rods were loaded onto the forklift and driven across the street (literally) to Dave’s shop where the old rod brasses could be pressed out. Thanks to our redneck rod brass press, all the brasses came out without much trouble. New brasses will be manufacture in the coming months.

Next up in February we will have the official FRA post hydro interior inspection, which will be the final FRA visit prior to the locomotive being steam tested. We also plan to have the smokebox back together and start reinstalling the firebrick in the firebox. Lastly, the boiler insulation should be applied to the boiler barrel. Along with all that, we are prepping up to get some dirt work done for track over at our new museum home.

February and on into spring should be an exciting time for the #18 project. As always, thanks for your on going support!